zondag 26 maart 2023

Verjaardagskaartjes - birthdaycards

Goede voornemens gaan met mij niet goed samen. Ik had me voorgenomen om regelmatiger een post te plaatsen maar dat is helaas niet gelukt.  Ik ga jullie nu een aantal dagen spammen. En er zit variatie in deze keer. Te beginnen met de verjaardagskaarten van zo'n 4 maand.
De eerste is voor onze kleinzoon. Zijn lievelingsknuffel is een panda. 

Good intentions don't go well with me. I had planned to post more regularly but unfortunately it didn't work out. I'm going to spam you for a few days now. And there's some variation this time. Let's start with the birthdaycards.
The first is for our grandson. His favourite teddy is a panda. 


Dezelfde stempel, andere kleur voor de achtergrond. Same stamps, different colours for the background.


dinsdag 14 februari 2023

Valentijn - Valentine

2 kaartjes gemaakt voor een Valentijn swap. De twee onderste kaartjes mocht ik ontvangen.

I made 2 cards for a Valentine's Day swap. The other two cards I received.


dinsdag 10 januari 2023

ATC swap

Dit zijn de ATC's van de laatste swaps van ATC België.
Het eerste had als thema: fantasie moodboard. Mijn interpretatie was niet volledig correct want ik heb er enkel de fantasie uit gehaald.

Voor de swap van december ging het meer om een techniek. Achtergrond maken met acrylverf en stempelen met StaZon. Het thema was vrij. 

These are the ATCs from ATC Belgium's latest swaps.
The first one had the theme: fantasy mood board. My interpretation was not entirely correct as I only took fantasy out of it.

For the December swap and very last one, it was more about a technique. Making the background with acrylic paint and stamp with StaZon. The theme was free.

Fantasie moodbord - Fantasy moodboard

Acrylverf, StaZon - Acrylic paint, StaZon

Mapje buiten- en binnenzijde - Inside and outside of folder


maandag 9 januari 2023

Lost coast designs challenge

Mijn dag kan niet meer stuk. Ik ben de gelukkige winnaar van de lost coast design challenge van december. Dank je wel.

I'm the lucky winner of the lost coast design challenge #157 something seasonal. Thank you.


zondag 1 januari 2023

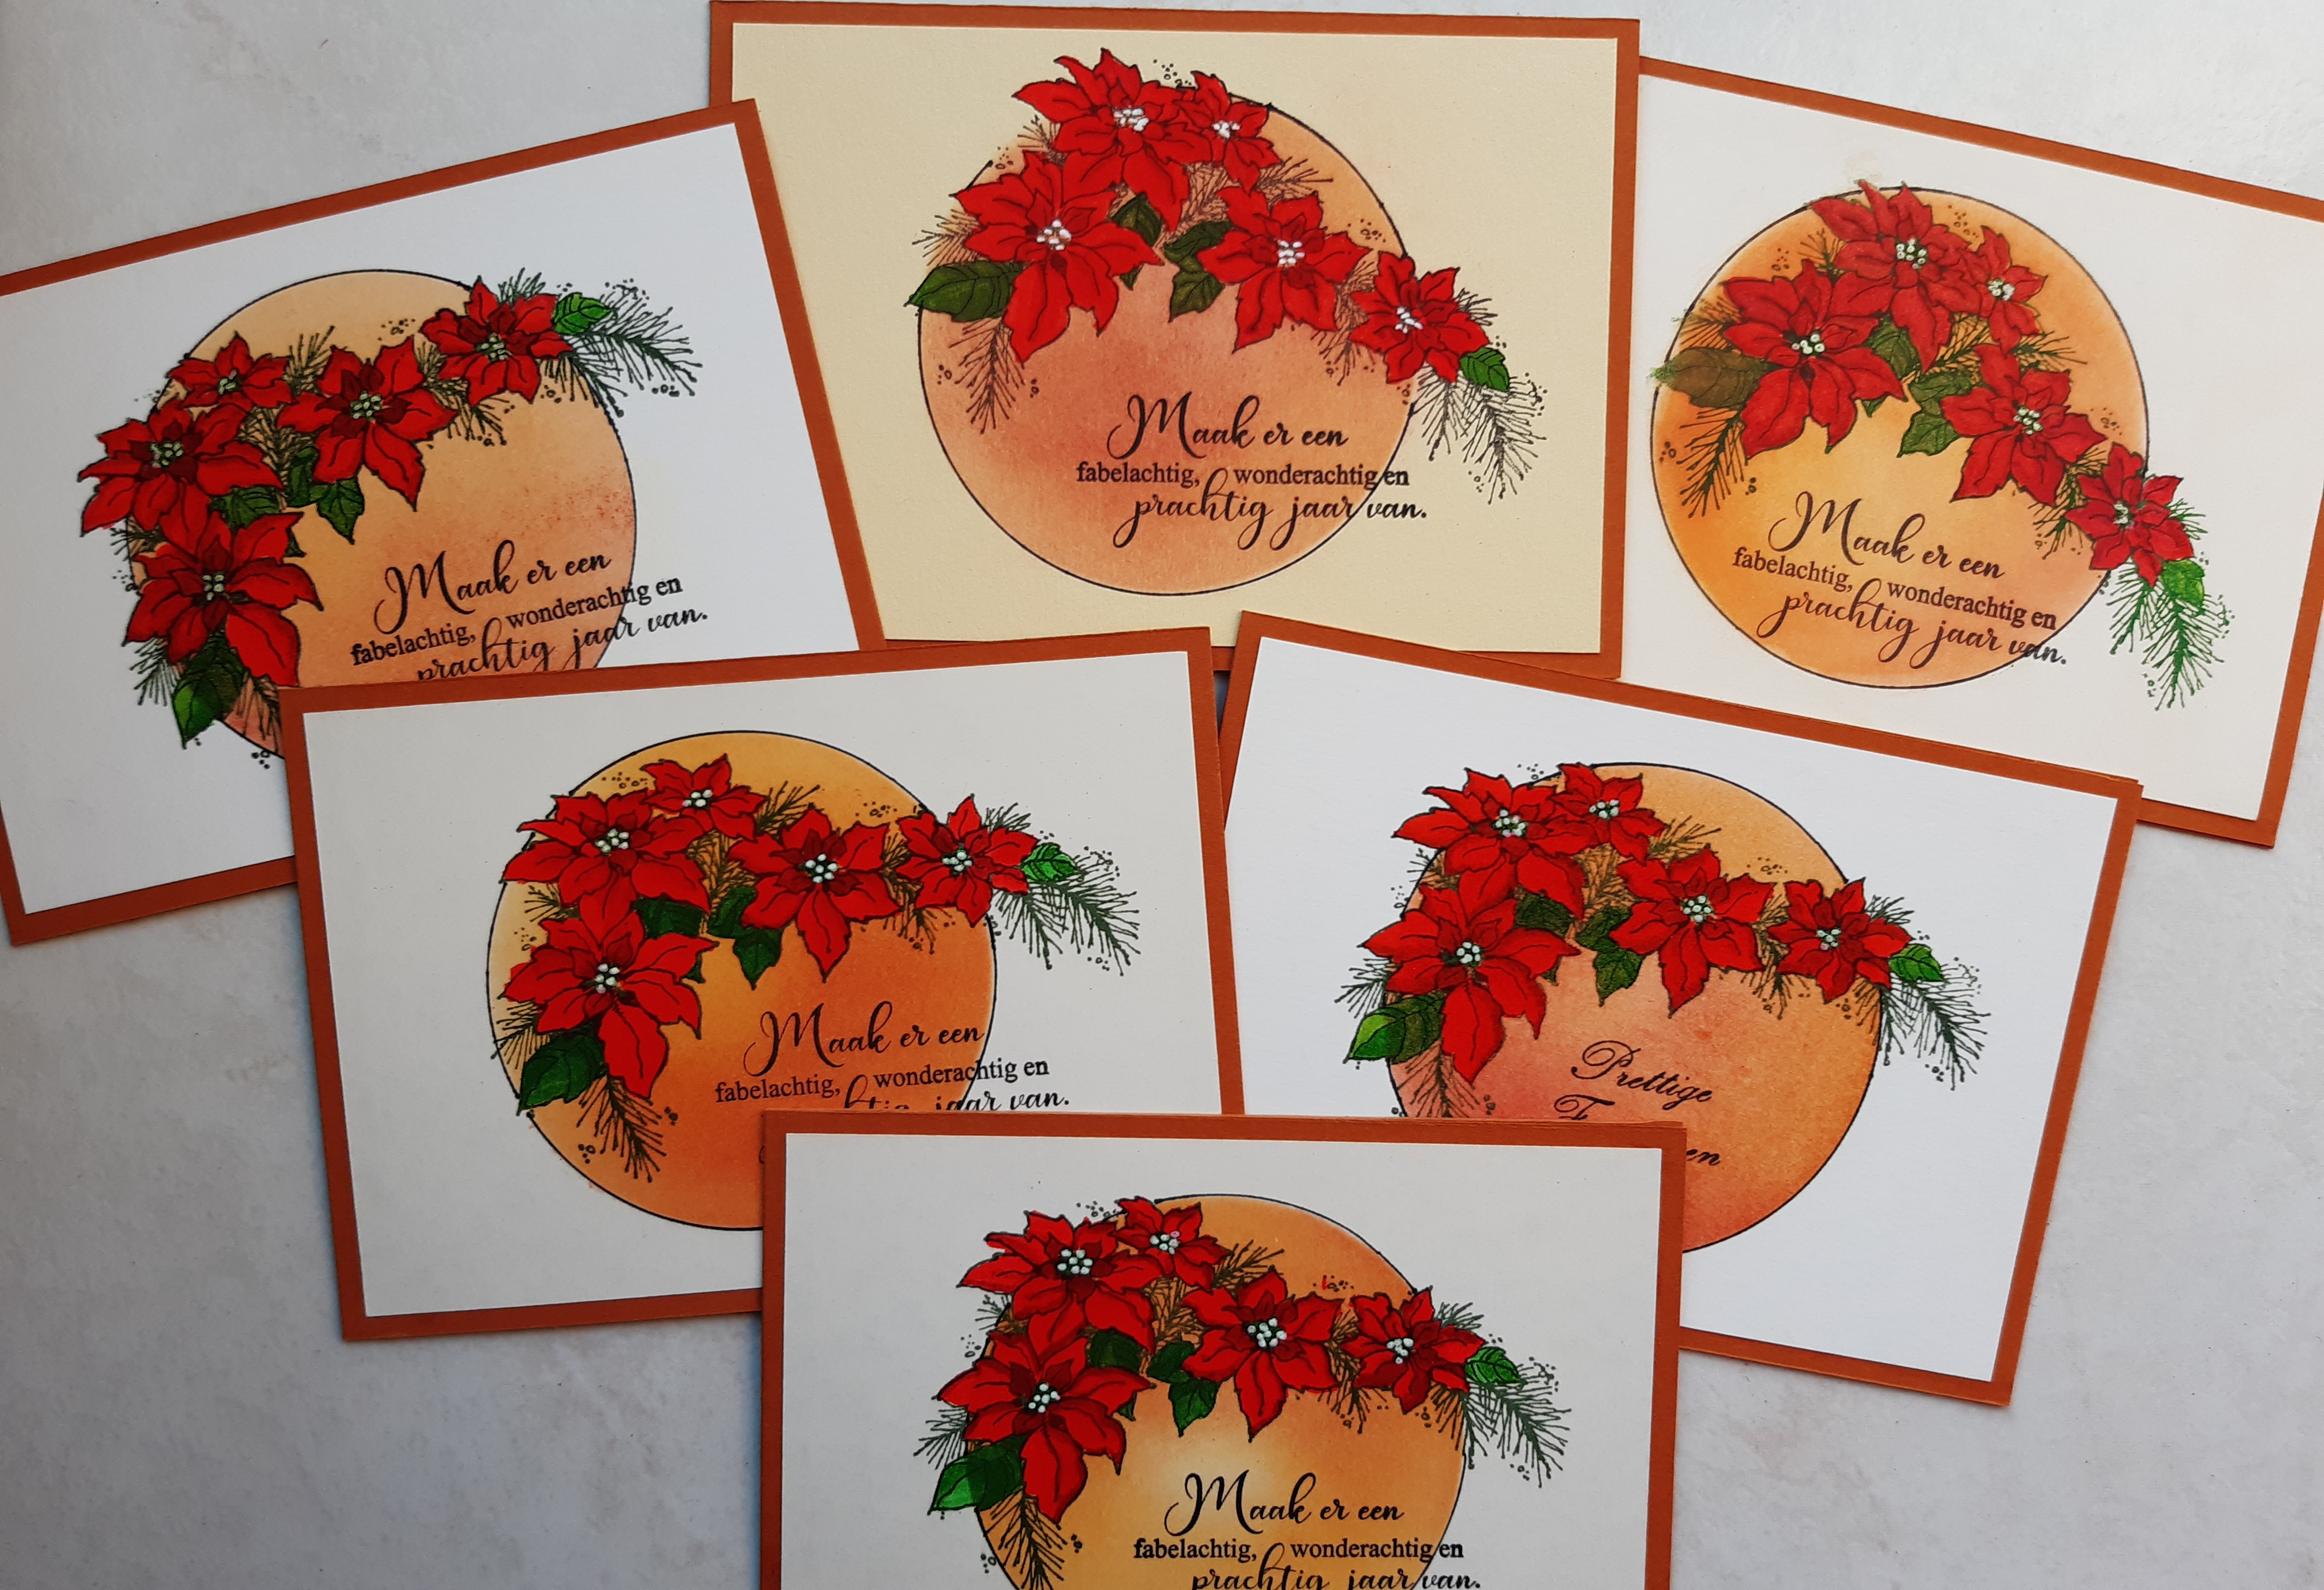
Gelukkig Nieuwjaar - Happy New Year

Maak er een fabelachtig,
wonderachtig 
en 
prachtig jaar van.

Make it fabulous,
miraculous 
and wonderful.

Voor de kinderen maak ik elk jaar een speciale kaart. 
A special card made for the children.


maandag 26 december 2022

Kerstkaarten - Christmascards

Het is bijna niet te geloven maar al mijn kerstkaarten waren half december al klaar en zijn verstuurd. Ik kan ze hier dan ook tonen. 

It is almost unbelievable but all my Christmas cards were ready and sent out by mid-December. So I can show them here. 


zondag 25 december 2022

Fijne Kerst - Merry Christmas

Als ik één wens mag doen, wens ik jullie een warme Kerst in gezelschap van mensen die je dierbaar zijn.

If I can make one wish, I wish you a warm Christmas in the company of people you love.


Gebruikte materialen / used materials:
Stempels - stamps: Lost coast designs (gnomes), de Stempelmakers-Siriushobby (lichtjes - lights), Tekst - text: EMG

Met deze kaart wil ik deelnemen aan de Lost coast design uitdaging #157 - something seasonal
With this card I wish to particapate in the Lost coast design challenge #157 - something seasonal 


woensdag 16 november 2022

Uitdaging november - challenge november

Deze maand stelde Christine ons voor een iets moeilijkere uitdaging. 
Best kan men het omschrijven als het maken van een 'tegeltjeskaart'.
De basiskaart rillen zodat er een gridpatroon ontstaat. Met behulp van een tweede kaart gaan we de basiskaart maskeren en sponzen.
Daarna stempelen op de kaart en verder afwerken.
Dit is mijn eerste probeersel en ineens de eerste kerstkaart van het jaar.

This month, Christine presented us with a slightly more difficult challenge.
Best described as making a card with a 'tile pattern'.
Using a scoreboard we crease the base card to create a grid pattern. We do the same with a second card from which we cut a row of tiles. We use this second card to mask and sponge the base card. Then stamp on the card and finish.
This is my first try and at once the first Christmas card of the year.


zondag 6 november 2022

Geboortekaartjes

Deze zomer werden enkele baby's geboren bij vrienden en familie. Ik had eerst kaartjes gemaakt volgens de techniek die we geleerd hadden op de workshop van Willie Duit. Maar mijn echtgenoot vond deze niet geschikt als babykaart. Ze waren niet schattig genoeg. Dan maar 2 andere 'schattige' kaartjes gemaakt.

This summer, some babies were born to friends and family. I had first made cards using the technique we had learnt at Willie Duit's workshop. But my husband thought these were not suitable as baby cards. They were not cute enough. Then I made 2 other 'cute' cards.


dinsdag 1 november 2022

Uitdaging oktober - challenge october

Voor oktober had Christine weer een leuke uitdaging voor ons.

- Scheur stroken papier, geef de randen een kleurtje.
- Eventueel kan je voor het scheuren hier en daar een lichte stempel afdruk maken.
- Scheur de strookjes in stukjes en geef ook de 2 overige randjes een kleurtje.
- Smeer een paar centimeters van de kaart in met Mod Podge .
- Schik daarop de stukjes papier dakpans gewijze.
- Herhaal tot de hele kaart vol gekleefd is met stukjes papier.
- Als de hele basiskaart vol gekleefd is met stukjes papier geef je bovenop nog ’n extra laagje Mod Podge.
   Zo zit alles goed vast en krijg je na droging ’n soort vernis laagje.
- Dan snij je de randen zodat de kaart een paar millimeter kleiner is dan de mat en de randen netjes zijn.
- Werk verder af.


For October, Christine had another nice challenge for us.

- Tear strips of paper, colour the edges.
- Before tearing the strops, you can make a light stamp here and there.
- Tear the strips into pieces and colour the 2 remaining edges too.
- Coat a few centimetres of the card with Mod Podge .
- Arrange the pieces of paper roof tile-wise on top.
- Repeat until the whole card is filled with pieces of paper.
- When the whole base card is covered with pieces of paper, add an extra layer of Mod Podge on top.
  This way everything is firmly stuck and you get a kind of varnish when dry.
- Then cut the edges so that the card is a few millimetres smaller than the mat and the edges are neat.
- Finish the card.